Friday, 24 May 2013


Description:-

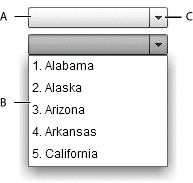
In this example I will explain that how to bind dropdown list with xml file. Binding dropdown list with values from database is common requirement ,but sometime we may have a requirement like binding the data from xml file or other files with dropdown list.


You can easily add the value into a DropDownList. But the main problem is that if there are any more items then you have to go to the .aspx file or .cs file and you have to add the new item(s).

So the best way is to add your DropDownList item data into a separate XML file. And bind data item from this XML file to the Dropdownlist .the main bebefit is that If any change is required then you just have to add or modify the new item into the XML file. That's it. All the DropDownList controls that uses that XML file gets the new item data automatically and you do not have change in all .aspx or .cs page but you just have to change in one XMl file or whatever any other file that you use to bind the data in Dropdownlist.


 We all Know Bind Country and state in DropdownList is Very Easy task with two table one is country and second is state and we can give relationship with each other.

in this Example we can Bind Country and State from XML file that is very Difficult task then simply Bind from Sql Database.

To Retrieve Data Frm the XML File First you Have open its in Read Mode and Fetch Data like CountryName and State Name From it and then Bind to the DropDownList.

Here is a Code How to Open or Use XML File in our aspx.cs page

DataSet ds = new DataSet();

        string apppath = Request.PhysicalApplicationPath;

        ds.ReadXml(MapPath("~\\" + "HelperClass\\XML_Files\\CountryOrState.xml"));

        DataTable dt = ds.Tables[0];

        ddlCountry.DataTextField = "Name";

        ddlCountry.DataValueField = "ConId";

        ddlCountry.DataSource = dt;

        ddlCountry.DataBind();

        ddlCountry.Items.Insert(0, "Select Country");

you can also perform Insert,Update,Delete Operation in Xml File or Binding Data to Gridview Easily. To Look this Program Click Here  insert upadate Delete in XML File in ASsp.net

the main Advantage of this Example is that you can Reduce the Load on the database because we can bind data from the XML file so there is no load on Sqlserver.

            But,problem is that when bind country and state from xml file not from sql database.so how to bind country and state from xml file are as shown below.


How Read and Write File in Asp.Net Read/Write File in Asp.Net with C#

Dynamically Create DataTable and Bind to Gridview Dyanmic creation of rows

How to Bind DropDownList from XML file in asp.net


Description:-

In this example I will explain that how to bind dropdown list with xml file. Binding dropdown list with values from database is common requirement ,but sometime we may have a requirement like binding the data from xml file or other files with dropdown list.


You can easily add the value into a DropDownList. But the main problem is that if there are any more items then you have to go to the .aspx file or .cs file and you have to add the new item(s).

So the best way is to add your DropDownList item data into a separate XML file. And bind data item from this XML file to the Dropdownlist .the main bebefit is that If any change is required then you just have to add or modify the new item into the XML file. That's it. All the DropDownList controls that uses that XML file gets the new item data automatically and you do not have change in all .aspx or .cs page but you just have to change in one XMl file or whatever any other file that you use to bind the data in Dropdownlist.


 We all Know Bind Country and state in DropdownList is Very Easy task with two table one is country and second is state and we can give relationship with each other.

in this Example we can Bind Country and State from XML file that is very Difficult task then simply Bind from Sql Database.

To Retrieve Data Frm the XML File First you Have open its in Read Mode and Fetch Data like CountryName and State Name From it and then Bind to the DropDownList.

Here is a Code How to Open or Use XML File in our aspx.cs page

DataSet ds = new DataSet();

        string apppath = Request.PhysicalApplicationPath;

        ds.ReadXml(MapPath("~\\" + "HelperClass\\XML_Files\\CountryOrState.xml"));

        DataTable dt = ds.Tables[0];

        ddlCountry.DataTextField = "Name";

        ddlCountry.DataValueField = "ConId";

        ddlCountry.DataSource = dt;

        ddlCountry.DataBind();

        ddlCountry.Items.Insert(0, "Select Country");

you can also perform Insert,Update,Delete Operation in Xml File or Binding Data to Gridview Easily. To Look this Program Click Here  insert upadate Delete in XML File in ASsp.net

the main Advantage of this Example is that you can Reduce the Load on the database because we can bind data from the XML file so there is no load on Sqlserver.

            But,problem is that when bind country and state from xml file not from sql database.so how to bind country and state from xml file are as shown below.


How Read and Write File in Asp.Net Read/Write File in Asp.Net with C#

Dynamically Create DataTable and Bind to Gridview Dyanmic creation of rows
Thursday, 23 May 2013


Description:-

                        To create a confirm Box in MVC by using the Following Link like
for ex:-

 <%= Html.ActionLink("Delete", "Delete",
    new { id = item.Id },

    new { onclick = "return confirm('Are you sure you wish to delete this record?');" })     %>

Html.ActionLink create a Delete Link so When User Click on this Link the confirm Box will Automatically available with two Button ok and cancel For confirmation to Delete this records. The Confirm Box Return True and False if User Click on Cancel Button then Confirm Box is Hide and it will not Fire the Delete Button Click Event. But if User Click on the ok Button then ConfirmBox will Return True and it will Fire the Delete Button Click Event to Perform Delete Operation.

how to send SMS in asp.net click here Send SMS to user in asp.net

how to Export Gridview data to PDF in asp.net Export Gridview Data to PDF

Modalpopup for insert update delete in mvc click here Modalpopup for insert update delete in mvc

How To Create Confirm Box When Click on Delete link of GridView in MVC4 in Asp.Net


Description:-

                        To create a confirm Box in MVC by using the Following Link like
for ex:-

 <%= Html.ActionLink("Delete", "Delete",
    new { id = item.Id },

    new { onclick = "return confirm('Are you sure you wish to delete this record?');" })     %>

Html.ActionLink create a Delete Link so When User Click on this Link the confirm Box will Automatically available with two Button ok and cancel For confirmation to Delete this records. The Confirm Box Return True and False if User Click on Cancel Button then Confirm Box is Hide and it will not Fire the Delete Button Click Event. But if User Click on the ok Button then ConfirmBox will Return True and it will Fire the Delete Button Click Event to Perform Delete Operation.

how to send SMS in asp.net click here Send SMS to user in asp.net

how to Export Gridview data to PDF in asp.net Export Gridview Data to PDF

Modalpopup for insert update delete in mvc click here Modalpopup for insert update delete in mvc
This entry was posted in :

Introduction:-


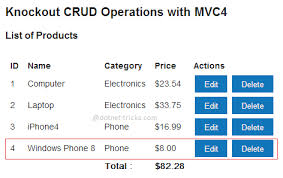
                    in this Example we simply Explain that How to perform CRUD Operation in Gridview using MVC4.


What is CRUD Operation:-

               
                                CRUD Operation means that Create,Read,Update,Delete operation in Database that is the short form are very speaked in IT Field.

In this Example we Simply Create a three Function for Edit Inset and Delete operation. In which we simply Define the Controller Class Code means Logic part the Designing part we cannot cover in this Example.

This is the same Facility as we Define in simple Gridview with Asp.net C#, but Here in MVC we can Have to Create Four Design Form like Create,Insert,Update and last is Delete.

 Implement Remember Me functionality using CheckBox ASP.Net 

set WaterMark Text in PDF using itextsharp in C#

How to set Default Button in MVC Web Form Application 

How to Bind XML File data to Treeview in asp.net

JQuery datepicker calender with Dropdown month and year in asp.net.
                    

How To Create Insert Update Delete in Gridview in MVC4.

Introduction:-


                    in this Example we simply Explain that How to perform CRUD Operation in Gridview using MVC4.


What is CRUD Operation:-

               
                                CRUD Operation means that Create,Read,Update,Delete operation in Database that is the short form are very speaked in IT Field.

In this Example we Simply Create a three Function for Edit Inset and Delete operation. In which we simply Define the Controller Class Code means Logic part the Designing part we cannot cover in this Example.

This is the same Facility as we Define in simple Gridview with Asp.net C#, but Here in MVC we can Have to Create Four Design Form like Create,Insert,Update and last is Delete.

 Implement Remember Me functionality using CheckBox ASP.Net 

set WaterMark Text in PDF using itextsharp in C#

How to set Default Button in MVC Web Form Application 

How to Bind XML File data to Treeview in asp.net

JQuery datepicker calender with Dropdown month and year in asp.net.
                    

Sunday, 21 April 2013


What is Lamda Expression:-

A lambda expression is an anonymous function that you can use to create delegates or expression tree types. By using lambda expressions, you can write local functions that can be passed as arguments or returned as the value of function calls. Lambda expressions are particularly helpful for writing LINQ query expressions.

Description:-

               In this example we can create a CRUD operation with LINQ but not through simple query but with the use of Lamda Expression.


    by using lamda expression we can reduce the length of Query so your code is very shortly and you can easily do the operation rather than simple long query 


In Linq you have to First Create a one DBML File in which you have to Add a all Table that you have to use in a application so not need to Connecton. And also you have to add Namespace using System.Linq instead  of  using System.Data.SqlClient;
 
to show Example of insert,update,delete in gridview using WCF Service please click here WCF Service For Insert,update,Delete
             
to show Example of insert,update,delete in gridview using LINQ please click here insert,update,delete using Linq

to show Example of insert,update,delete in gridview using Naming Container please click here Naming Container for insert update Delete in Gridview

to show Example of insert,update,delete in gridview using Modal Popup please click here insert,update,delete in Modal Popup

 to show Example of insert,update,delete in gridview using Stored Procedure please click here insert,update,delete through stored Procedure

  to show Example of insert,update,delete in XML File and bind to Gridview please click here insert,upadte,delete in XML File

  to show Example of insert,update,delete in gridview using Three Tier Architecture please click here Three Tier Architecture For insert,update,Delete

so How to insert update Delete through Lamda Expression Query are as define below code...


How to insert update delete in Gridview Using LINQ with Lamda Expression in asp.net


What is Lamda Expression:-

A lambda expression is an anonymous function that you can use to create delegates or expression tree types. By using lambda expressions, you can write local functions that can be passed as arguments or returned as the value of function calls. Lambda expressions are particularly helpful for writing LINQ query expressions.

Description:-

               In this example we can create a CRUD operation with LINQ but not through simple query but with the use of Lamda Expression.


    by using lamda expression we can reduce the length of Query so your code is very shortly and you can easily do the operation rather than simple long query 


In Linq you have to First Create a one DBML File in which you have to Add a all Table that you have to use in a application so not need to Connecton. And also you have to add Namespace using System.Linq instead  of  using System.Data.SqlClient;
 
to show Example of insert,update,delete in gridview using WCF Service please click here WCF Service For Insert,update,Delete
             
to show Example of insert,update,delete in gridview using LINQ please click here insert,update,delete using Linq

to show Example of insert,update,delete in gridview using Naming Container please click here Naming Container for insert update Delete in Gridview

to show Example of insert,update,delete in gridview using Modal Popup please click here insert,update,delete in Modal Popup

 to show Example of insert,update,delete in gridview using Stored Procedure please click here insert,update,delete through stored Procedure

  to show Example of insert,update,delete in XML File and bind to Gridview please click here insert,upadte,delete in XML File

  to show Example of insert,update,delete in gridview using Three Tier Architecture please click here Three Tier Architecture For insert,update,Delete

so How to insert update Delete through Lamda Expression Query are as define below code...


What Is LINQ:-

                 LINQ is a new feature available from .net version 3.0 and above. It called as LANQUAGE INTEGRATED QUERY there are different flavours of LINQ available like LINQ TO SQL, LINQ TO XML etc.. Taking advantage of LINQ you can query the collection as if you are querying from a database. 

Basic example
var users = from userVariable in studentCollection
select userVariable.ID;
Description:-

            In this example we simply Define How to Create insert update delete in gridview using LINQ. we all know the CRUD operation in Gridview through SQL is also easy but the Advantage of the LINQ is that you need not a connection and the length of code of CRUD operation is very shortly than an SQL query. 

     also the LINQ is language integrated query, you can easily perform all operation and very short time than SQL.


the CRUD operation Demo through SQL is also available click here CRUDinGridview
Send SMS to user Mobile in asp.net Send SMS in asp.net
Enter only Alphabet in TextBox Validation in Javascript for enter only Alphabet

How to insert update delete in Gridview through LINQ in asp.net


What Is LINQ:-

                 LINQ is a new feature available from .net version 3.0 and above. It called as LANQUAGE INTEGRATED QUERY there are different flavours of LINQ available like LINQ TO SQL, LINQ TO XML etc.. Taking advantage of LINQ you can query the collection as if you are querying from a database. 

Basic example
var users = from userVariable in studentCollection
select userVariable.ID;
Description:-

            In this example we simply Define How to Create insert update delete in gridview using LINQ. we all know the CRUD operation in Gridview through SQL is also easy but the Advantage of the LINQ is that you need not a connection and the length of code of CRUD operation is very shortly than an SQL query. 

     also the LINQ is language integrated query, you can easily perform all operation and very short time than SQL.


the CRUD operation Demo through SQL is also available click here CRUDinGridview
Send SMS to user Mobile in asp.net Send SMS in asp.net
Enter only Alphabet in TextBox Validation in Javascript for enter only Alphabet


What is Crystal Report:-
Crystal Reports is a business intelligence application used to design and generate reports from a wide range of data sources like SqlServer Oracle etc. Crystal Reports can access data from databases and can integrate this data from multiple databases within one Report using SqlServer Connectivity.

Description:-

we all know that very well Report is the main thing in each and every language. in many way people use report like Bill Generation etc..

                In this Example We can generate Report of Each row of Gridview When user is Click on Gridview Row. and also Note that we can not use the any table or database but main point is that we can  use XML file on which we can Bind data to gridview and perform CRUD operation on grid and Generate Report using CrystalReport.

          we all know that XML is also a one kind of Database and in XML that is very Difficult to perform a CRUD operation than an SQLServer database or other database.

     to perform operation in XML database first you have to open the file and you have to open it in write mode.

 in this Example we can also store the image in XML database and also Bind,edit,Delete image in gridview fetch from XML file. we also provide when user click on each record of gridview then this record is printed on the Crystal Report.

we also provide to generate Report of the Whole Record which are display in Gridview.


to show Example of insert,update,delete in gridview using WCF Service please click here WCF Service For Insert,update,Delete
             
Export Gridview Data to PDF File Transfer Gridview row to PDF File

Create/Generate Random or Unique Password Generate Password


Crystal reports example/sample in asp.net or Display Image in Report Fetch from Gridview


What is Crystal Report:-
Crystal Reports is a business intelligence application used to design and generate reports from a wide range of data sources like SqlServer Oracle etc. Crystal Reports can access data from databases and can integrate this data from multiple databases within one Report using SqlServer Connectivity.

Description:-

we all know that very well Report is the main thing in each and every language. in many way people use report like Bill Generation etc..

                In this Example We can generate Report of Each row of Gridview When user is Click on Gridview Row. and also Note that we can not use the any table or database but main point is that we can  use XML file on which we can Bind data to gridview and perform CRUD operation on grid and Generate Report using CrystalReport.

          we all know that XML is also a one kind of Database and in XML that is very Difficult to perform a CRUD operation than an SQLServer database or other database.

     to perform operation in XML database first you have to open the file and you have to open it in write mode.

 in this Example we can also store the image in XML database and also Bind,edit,Delete image in gridview fetch from XML file. we also provide when user click on each record of gridview then this record is printed on the Crystal Report.

we also provide to generate Report of the Whole Record which are display in Gridview.


to show Example of insert,update,delete in gridview using WCF Service please click here WCF Service For Insert,update,Delete
             
Export Gridview Data to PDF File Transfer Gridview row to PDF File

Create/Generate Random or Unique Password Generate Password


Description:-

                 In this Example we define that how to Display Image in crystal Report Retrive From database.for example we have one record with name,address and third is it's Image. so that's type of data how we can Display in CrystalReport when user click on each row of Gridview The same record are display in Report and you can also navigate the record printing record in report.

In Simple you Bind the data in CrystalReport then it will Display Name of the Image not Image so avoid this Sitution we Have to Convert this Image in ByteArray If DataType of the Photo or Image Coloumn in database is String if DataType is Image then you did not Require to Covert into ByteArray Because It also Return ByteArray.

If Your Coloumn(photo,iamge etc..) Defines with String DataType then First You Have to Convert it into ByteArray. To Convert this Code is Here

public static byte[] ReadImageFile(string PostedFileName, string[] filetype)
    {
        bool isAllowedFileType = false;
        try
        {
            FileInfo file = new FileInfo(PostedFileName);

            strFile_Name = file.Name;

            foreach (string strExtensionType in filetype)
            {
                if (strExtensionType == file.Extension)
                {
                    isAllowedFileType = true;
                    break;
                }
            }
            if (isAllowedFileType)
            {
                FileStream fs = new FileStream(PostedFileName, FileMode.Open, FileAccess.Read);

                BinaryReader br = new BinaryReader(fs);

                byte[] image = br.ReadBytes((int)fs.Length);

                br.Close();

                fs.Close();

                return image;
            }
            return null;
        }
        catch (Exception ex)
        {
            throw ex;
        }

    }


To Call this Function Pass Parameter Like this

Byte[]  bt = ReadImageFile(s, new string[] { ".GIF", ".gif", ".jpg", ".bmp", ".jpeg" });

To Show How To Convert ByteArray to Image or Image to ByteArray Click this Link Convert ByteArray to Image And Image to ByteArray

Upload File and Bind to Gridview Upload and Bind Image to Gridview

AutoComplete TextBox Search Example Autocomplete Search in Ajax

Crystal Reports Display Images From Database in Asp.Net


Description:-

                 In this Example we define that how to Display Image in crystal Report Retrive From database.for example we have one record with name,address and third is it's Image. so that's type of data how we can Display in CrystalReport when user click on each row of Gridview The same record are display in Report and you can also navigate the record printing record in report.

In Simple you Bind the data in CrystalReport then it will Display Name of the Image not Image so avoid this Sitution we Have to Convert this Image in ByteArray If DataType of the Photo or Image Coloumn in database is String if DataType is Image then you did not Require to Covert into ByteArray Because It also Return ByteArray.

If Your Coloumn(photo,iamge etc..) Defines with String DataType then First You Have to Convert it into ByteArray. To Convert this Code is Here

public static byte[] ReadImageFile(string PostedFileName, string[] filetype)
    {
        bool isAllowedFileType = false;
        try
        {
            FileInfo file = new FileInfo(PostedFileName);

            strFile_Name = file.Name;

            foreach (string strExtensionType in filetype)
            {
                if (strExtensionType == file.Extension)
                {
                    isAllowedFileType = true;
                    break;
                }
            }
            if (isAllowedFileType)
            {
                FileStream fs = new FileStream(PostedFileName, FileMode.Open, FileAccess.Read);

                BinaryReader br = new BinaryReader(fs);

                byte[] image = br.ReadBytes((int)fs.Length);

                br.Close();

                fs.Close();

                return image;
            }
            return null;
        }
        catch (Exception ex)
        {
            throw ex;
        }

    }


To Call this Function Pass Parameter Like this

Byte[]  bt = ReadImageFile(s, new string[] { ".GIF", ".gif", ".jpg", ".bmp", ".jpeg" });

To Show How To Convert ByteArray to Image or Image to ByteArray Click this Link Convert ByteArray to Image And Image to ByteArray

Upload File and Bind to Gridview Upload and Bind Image to Gridview

AutoComplete TextBox Search Example Autocomplete Search in Ajax

Friday, 5 April 2013


What is Nested Popup:-


                                    A ModalPopup inside other ModalPopup is Called a Nested Popup. In this Example we explain How to Create a nested Popup and Perform Insert and Delete Operation in this Popup.

Description:-

                        The ModalPopupExtender allows Users to Display Content of Element into the Popup. When Popup is Show at that popup is Display with HighLight and User are not allowed to do any other operation even the click on the other Control are not permitted.
You can provide OnShowing/OnHiding/OnHidden animations which are played when the modalPopupExtender  content is shown and hidden.

Property of the ModalPopupExtender:-
  TargetControlID - The ID of the  activates the modal popup.
  PopupControlID - The ID of the element to display as a modal popup like Button etc….
  BackgroundCssClass - The CSS class for Popup to apply to the background when the modal popup is displayed.
  DropShadow - True to automatically add a dropshadow to the modal popup.
  OkControlID - The ID of the element that dismisses the modal popup.
  OnOkScript - The script to run when the modal popup is dismissed using the element specified in OkControlID.
  CancelControlID - The ID of the Control that cancels the modal popup
  OnCancelScript - Script to run when the modal popup is dismissed with the CancelControlID
  PopupDragHandleControlID - The ID of the embedded element that contains the popup header/title which will be used as a drag handle
  X - The X coordinate of the top/left corner of the modal popup (the popup will be centered horizontally if not specified)
  Y - The Y coordinate of the top/left corner of the modal popup (the popup will be centered vertically if not specified)
  RepositionMode - The setting that determines if the popup needs to be repositioned when the window is resized or scrolled

Methods
  • initialize() - Initializes the ModalPopupExtender behavior.
  • dipose() – Disposes or End the ModalPopupExtender behavior.
  • show() - Displays the element that is referenced by the PopupControlID property as a modalpopup dialog box.
  • disableTab() - Changes the tab indexes so that tabbing moves the focus only through the modal dialog box.
    • Remarks - In Internet Explorer 6, the disableTab method also hides the select elements.
  • restoreTab() - Restores the tab indexes from the page.
    • Remarks - In Internet Explorer 6, the restoreTab method also restores the select elements.
  • hide() - Hides the modal popup.
    • Returns - Returns a Boolean value that specifies whether the popup was hidden.


MVC Modalpopup For Insert,Update,Delete CRUD Operation in MVC ModalPopup

Bind Image in DataList Control Database Image bind to DataList

Paging in Repeator Control Paging/Custom Paging in Repeator Control


Nested ModalPopupExtender with insert update delete operation in Asp.Net


What is Nested Popup:-


                                    A ModalPopup inside other ModalPopup is Called a Nested Popup. In this Example we explain How to Create a nested Popup and Perform Insert and Delete Operation in this Popup.

Description:-

                        The ModalPopupExtender allows Users to Display Content of Element into the Popup. When Popup is Show at that popup is Display with HighLight and User are not allowed to do any other operation even the click on the other Control are not permitted.
You can provide OnShowing/OnHiding/OnHidden animations which are played when the modalPopupExtender  content is shown and hidden.

Property of the ModalPopupExtender:-
  TargetControlID - The ID of the  activates the modal popup.
  PopupControlID - The ID of the element to display as a modal popup like Button etc….
  BackgroundCssClass - The CSS class for Popup to apply to the background when the modal popup is displayed.
  DropShadow - True to automatically add a dropshadow to the modal popup.
  OkControlID - The ID of the element that dismisses the modal popup.
  OnOkScript - The script to run when the modal popup is dismissed using the element specified in OkControlID.
  CancelControlID - The ID of the Control that cancels the modal popup
  OnCancelScript - Script to run when the modal popup is dismissed with the CancelControlID
  PopupDragHandleControlID - The ID of the embedded element that contains the popup header/title which will be used as a drag handle
  X - The X coordinate of the top/left corner of the modal popup (the popup will be centered horizontally if not specified)
  Y - The Y coordinate of the top/left corner of the modal popup (the popup will be centered vertically if not specified)
  RepositionMode - The setting that determines if the popup needs to be repositioned when the window is resized or scrolled

Methods
  • initialize() - Initializes the ModalPopupExtender behavior.
  • dipose() – Disposes or End the ModalPopupExtender behavior.
  • show() - Displays the element that is referenced by the PopupControlID property as a modalpopup dialog box.
  • disableTab() - Changes the tab indexes so that tabbing moves the focus only through the modal dialog box.
    • Remarks - In Internet Explorer 6, the disableTab method also hides the select elements.
  • restoreTab() - Restores the tab indexes from the page.
    • Remarks - In Internet Explorer 6, the restoreTab method also restores the select elements.
  • hide() - Hides the modal popup.
    • Returns - Returns a Boolean value that specifies whether the popup was hidden.


MVC Modalpopup For Insert,Update,Delete CRUD Operation in MVC ModalPopup

Bind Image in DataList Control Database Image bind to DataList

Paging in Repeator Control Paging/Custom Paging in Repeator Control


What Is LINQ:-


                 LINQ is a new feature available from .net version 3.0 and above. It called as LANQUAGE INTEGRATED QUERY there are different flavours of LINQ available like LINQ TO SQL, LINQ TO XML etc.. Taking advantage of LINQ you can query the collection as if you are querying from a database. 

Basic example
var users = from userVariable in studentCollection
select userVariable.ID;

Description:-


            In this example we simply Define How to Create insert update delete in gridview using LINQ. we all know the CRUD operation in Gridview through SQL is also easy but the Advantage of the LINQ is that you need not a connection and the length of code of CRUD operation is very shortly than an SQL query.

     also the LINQ is language integared query, you can easily perform all operation and very short time than SQL.


the CRUD operation Demo through SQL is also available click here CRUDinGridview

to show Example of how to send SMS in Asp.Net click here Send SMS to user in asp.net

to show Example of How to send Email to user in asp.net click here send Email in asp.Net

to show Example of How to Export Gridview Data to PDF in asp.net Export Gridview Data to PDF

How to Perform Insert,Update,Delete in Gridview using Linq in asp.net


What Is LINQ:-


                 LINQ is a new feature available from .net version 3.0 and above. It called as LANQUAGE INTEGRATED QUERY there are different flavours of LINQ available like LINQ TO SQL, LINQ TO XML etc.. Taking advantage of LINQ you can query the collection as if you are querying from a database. 

Basic example
var users = from userVariable in studentCollection
select userVariable.ID;

Description:-


            In this example we simply Define How to Create insert update delete in gridview using LINQ. we all know the CRUD operation in Gridview through SQL is also easy but the Advantage of the LINQ is that you need not a connection and the length of code of CRUD operation is very shortly than an SQL query.

     also the LINQ is language integared query, you can easily perform all operation and very short time than SQL.


the CRUD operation Demo through SQL is also available click here CRUDinGridview

to show Example of how to send SMS in Asp.Net click here Send SMS to user in asp.net

to show Example of How to send Email to user in asp.net click here send Email in asp.Net

to show Example of How to Export Gridview Data to PDF in asp.net Export Gridview Data to PDF

Friday, 22 March 2013


What is RegularExpression:-

            RegularExpression is also known as Regxp.by using RegularExpression First you have set some property of the RegularExpression are as follow

  • Add a RegularExpressionValidator control to your page.
  • Set the ControlToValidate property to indicate which control to validate.
  • Set the ValidationExpression property to an appropriate regular expression.
  • Set the ErrorMessage property to define the message to display if the validation fails.
 

Description:-


in this example we explain all validation like email validation,phone number or Mobile number validation,URL validation,Zipcode,validation Password etc.......

we all know that the Validation is main part in every place when the Form data is submited.
For exaple:- suppose you enter your Name in Digit and your Mobile Number in String Format is not a proper way so for this Reason we can use Validation Before Our data is Submited to the Server.

 through validation we can also reduce the load in server because the your data validation is checked in Clientside and then after it is valid then and then submited to server for further process otherwise you show a validation message like enter mobile number 10 digit only or your Email id is not Valid.


  so through validation you can built your website very smoothly. 


example of all validators like EmailValidator,Mobile no validator etc... in asp.net


What is RegularExpression:-

            RegularExpression is also known as Regxp.by using RegularExpression First you have set some property of the RegularExpression are as follow

  • Add a RegularExpressionValidator control to your page.
  • Set the ControlToValidate property to indicate which control to validate.
  • Set the ValidationExpression property to an appropriate regular expression.
  • Set the ErrorMessage property to define the message to display if the validation fails.
 

Description:-


in this example we explain all validation like email validation,phone number or Mobile number validation,URL validation,Zipcode,validation Password etc.......

we all know that the Validation is main part in every place when the Form data is submited.
For exaple:- suppose you enter your Name in Digit and your Mobile Number in String Format is not a proper way so for this Reason we can use Validation Before Our data is Submited to the Server.

 through validation we can also reduce the load in server because the your data validation is checked in Clientside and then after it is valid then and then submited to server for further process otherwise you show a validation message like enter mobile number 10 digit only or your Email id is not Valid.


  so through validation you can built your website very smoothly. 


Description:-

                  in this example we explain how to create a Fancy slide show of an Image witout Refreshing the page using Jquery.

today in Every Application or in Every website we all show that Slide show of the Buisness relative Images are Displayed in Slide show. so you can easily create a Beautiful Slide show and put it in your Application.

in which we use the jquery fadeOut() and  fadeIn() Function to move the image one by one from right to left and continuesoly display image from the bunch of image that we already set it in advance in design time.


Fancy Slideshow of Image Gallery in JQuery Slide Show in JQuery 

Fancy and Beautiful Login Popup in JQuery SignUp and Login Popup in Jquery  

how to Create Image slide show or Image Slider Using JQuery in asp.net


Description:-

                  in this example we explain how to create a Fancy slide show of an Image witout Refreshing the page using Jquery.

today in Every Application or in Every website we all show that Slide show of the Buisness relative Images are Displayed in Slide show. so you can easily create a Beautiful Slide show and put it in your Application.

in which we use the jquery fadeOut() and  fadeIn() Function to move the image one by one from right to left and continuesoly display image from the bunch of image that we already set it in advance in design time.


Fancy Slideshow of Image Gallery in JQuery Slide Show in JQuery 

Fancy and Beautiful Login Popup in JQuery SignUp and Login Popup in Jquery  

This entry was posted in :


Description:-

                  in this example we explain that how to create  onclick,onmouseover,onmousemove or other event   in Gridview Row at runtime or in CodeBehind Class.

When user is Move Mouse on Each Row of GridView you Can Perform Anything or Display Detail of Each Row in a ModalPopup.same thing you will perform with Onclick or OnMouseOver Event. This is  a one kind of facility or you can change the Color of the Row when Mouse is Clicked on each Row.

use of this example are as follws:-

  1. you can perform the onclick event in each row of gridview and you can change the color of row that are clicked or selected.
  1. you can perform the onmouse over method and its Detail are display in popup window
  2. you can also send the ID of each row to the next page when row is clicked.


how to create onclick,onmouse over,onmouseout event from code behind page in asp.net


Description:-

                  in this example we explain that how to create  onclick,onmouseover,onmousemove or other event   in Gridview Row at runtime or in CodeBehind Class.

When user is Move Mouse on Each Row of GridView you Can Perform Anything or Display Detail of Each Row in a ModalPopup.same thing you will perform with Onclick or OnMouseOver Event. This is  a one kind of facility or you can change the Color of the Row when Mouse is Clicked on each Row.

use of this example are as follws:-

  1. you can perform the onclick event in each row of gridview and you can change the color of row that are clicked or selected.
  1. you can perform the onmouse over method and its Detail are display in popup window
  2. you can also send the ID of each row to the next page when row is clicked.